
Hey guys! Happy Tuesday! Today I’m bringing you my first tutorial. 🙂 I’m using all (except for one!) drugstore/inexpensive products that are longwearing and natural with a little kick. 😉 Keep reading to see how to get the look!
STEP ONE:
This product isn’t shown, but I used a sample I had of the Maybelline Dream Fresh BB Cream in Light/Medium. I’m not really a fan of this product. In my opinion, I wouldn’t waste your money! This is basically a tinted moisturizer that has a pretty slick texture and I wouldn’t recommend it for oily skin folks. It isn’t going to cover much redness or blemishes, so be prepared to use a concealer. If you do use it, be sure to set it with a powder. I used the Rimmel Stay Matte powder in Buff Beige.
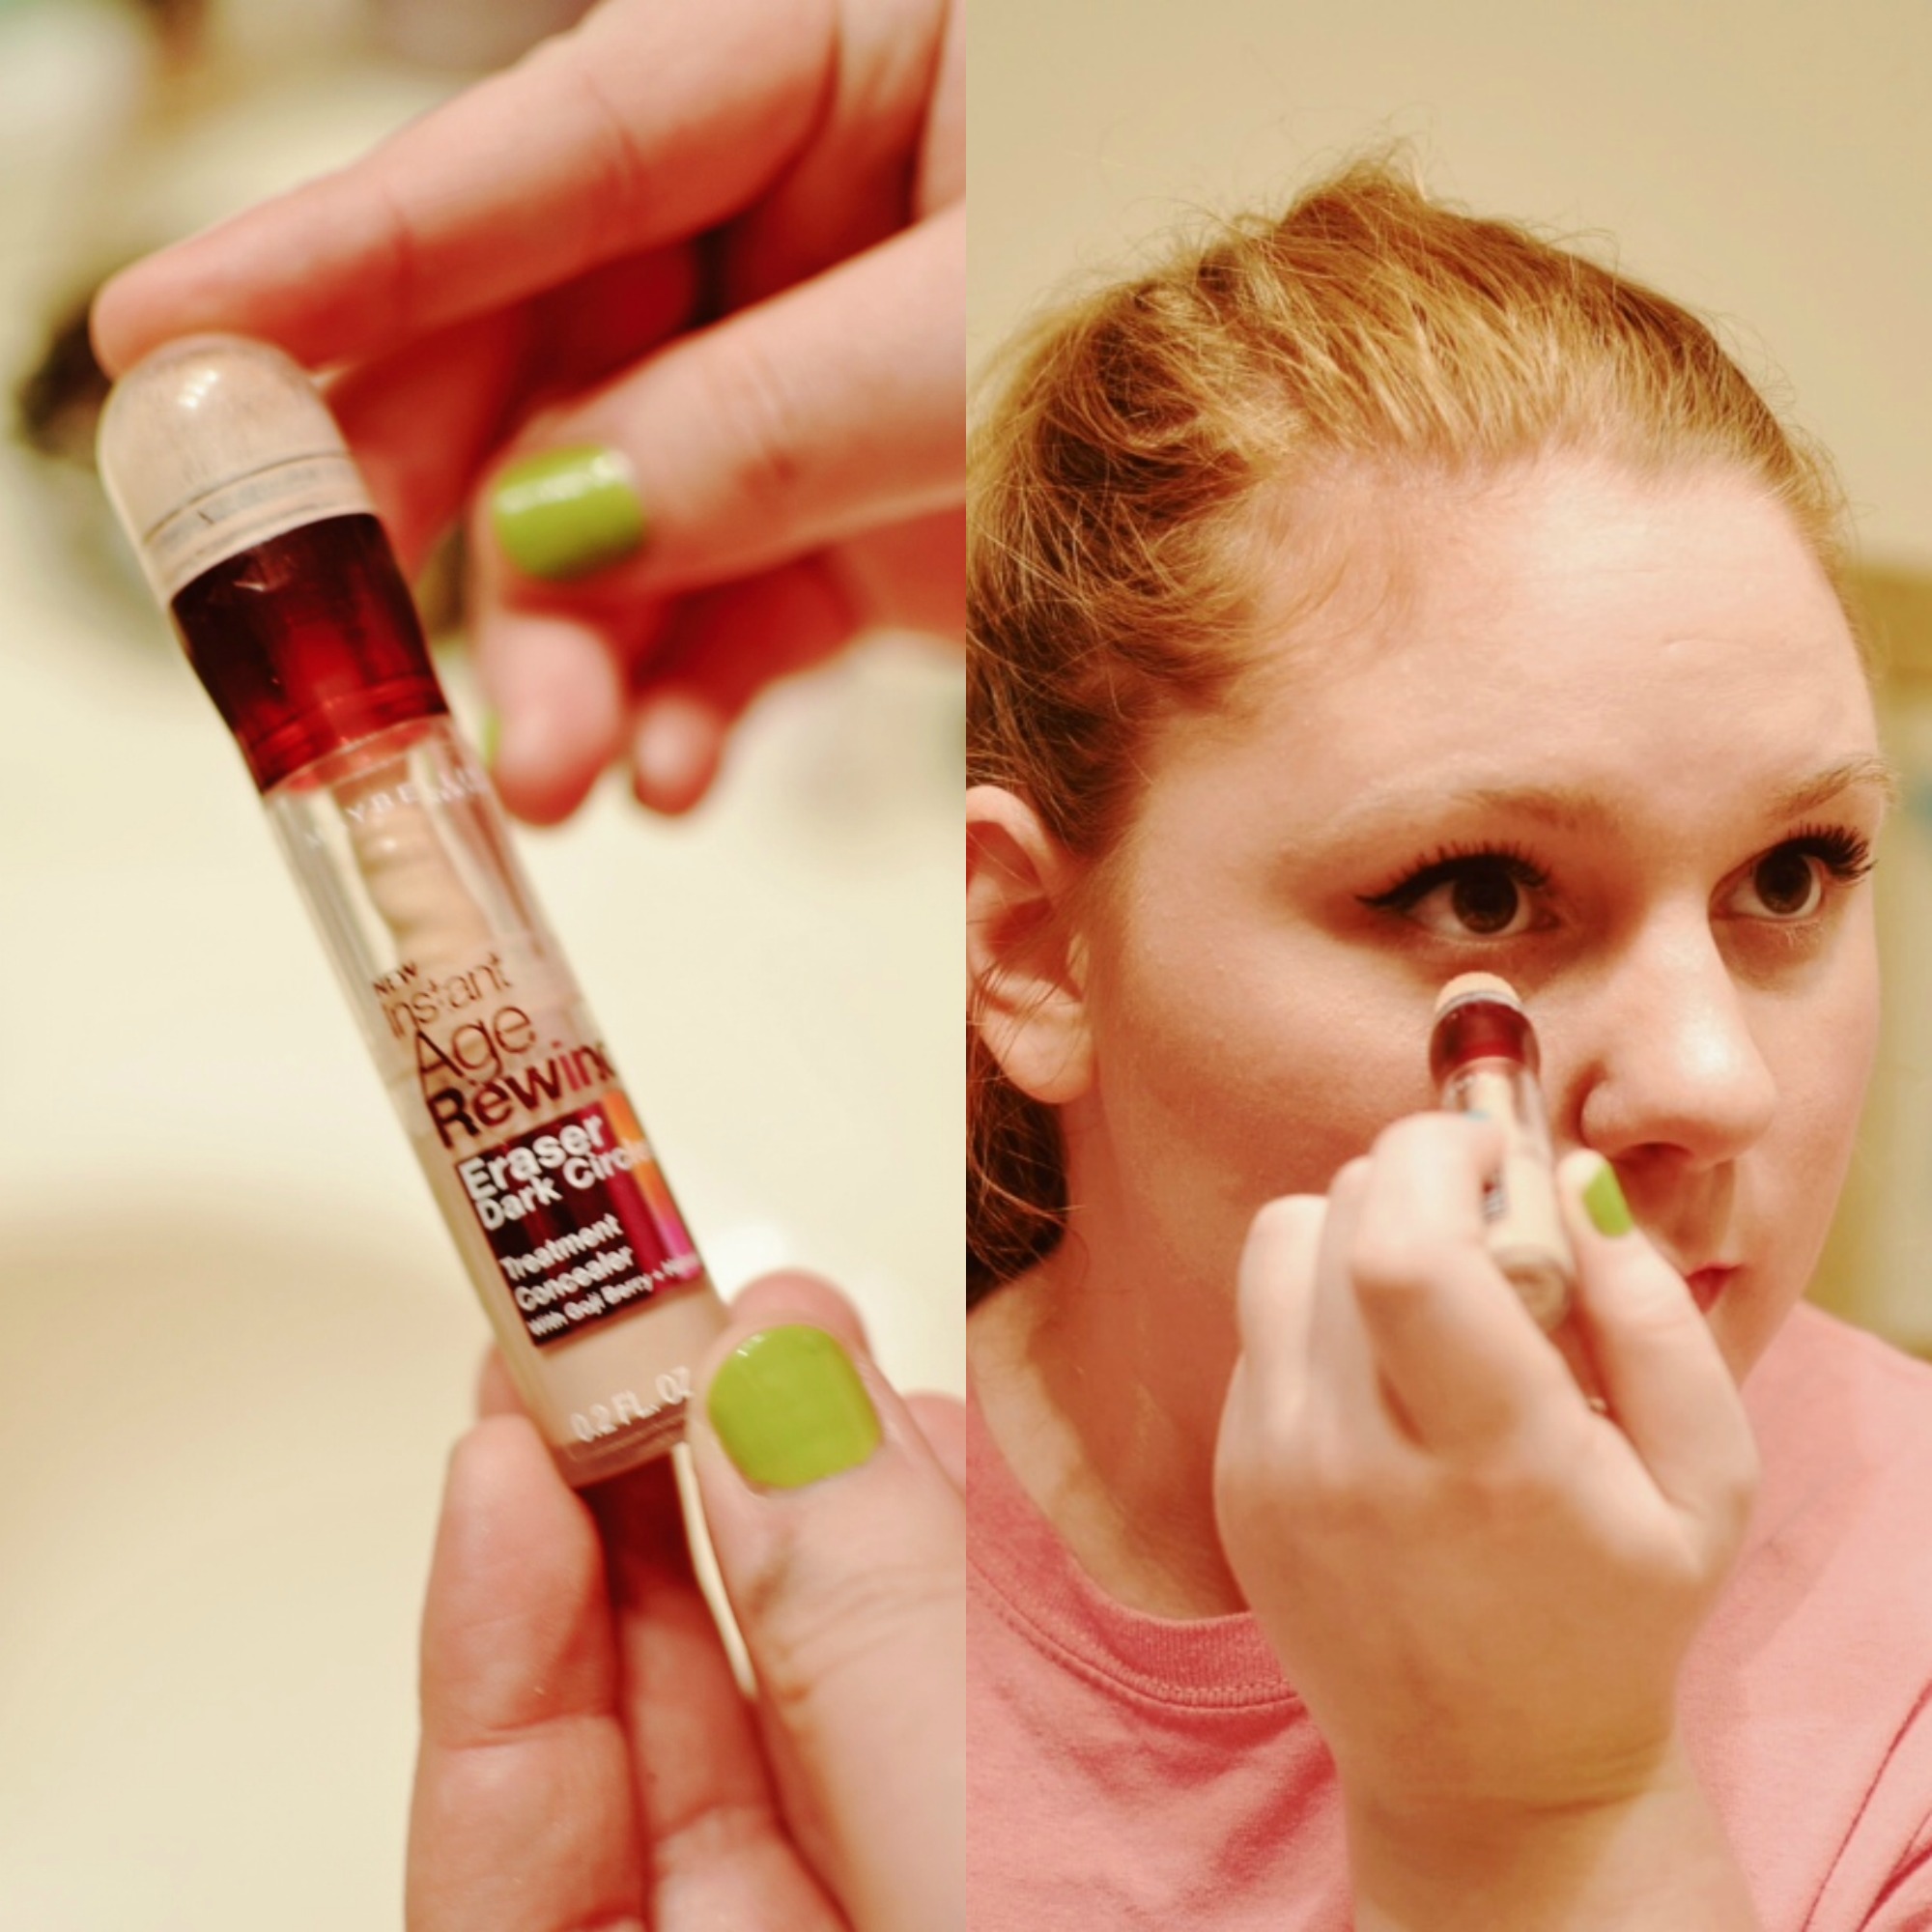
STEP TWO:
Conceal! I’m using the Maybelline Instant Age Rewind Dark Circle Concealer. It’s a liquidy concealer that comes through a domed sponge making it very easy to apply. I only apply this to my under eyes since it’s not very thick and just blend it with my fingers.
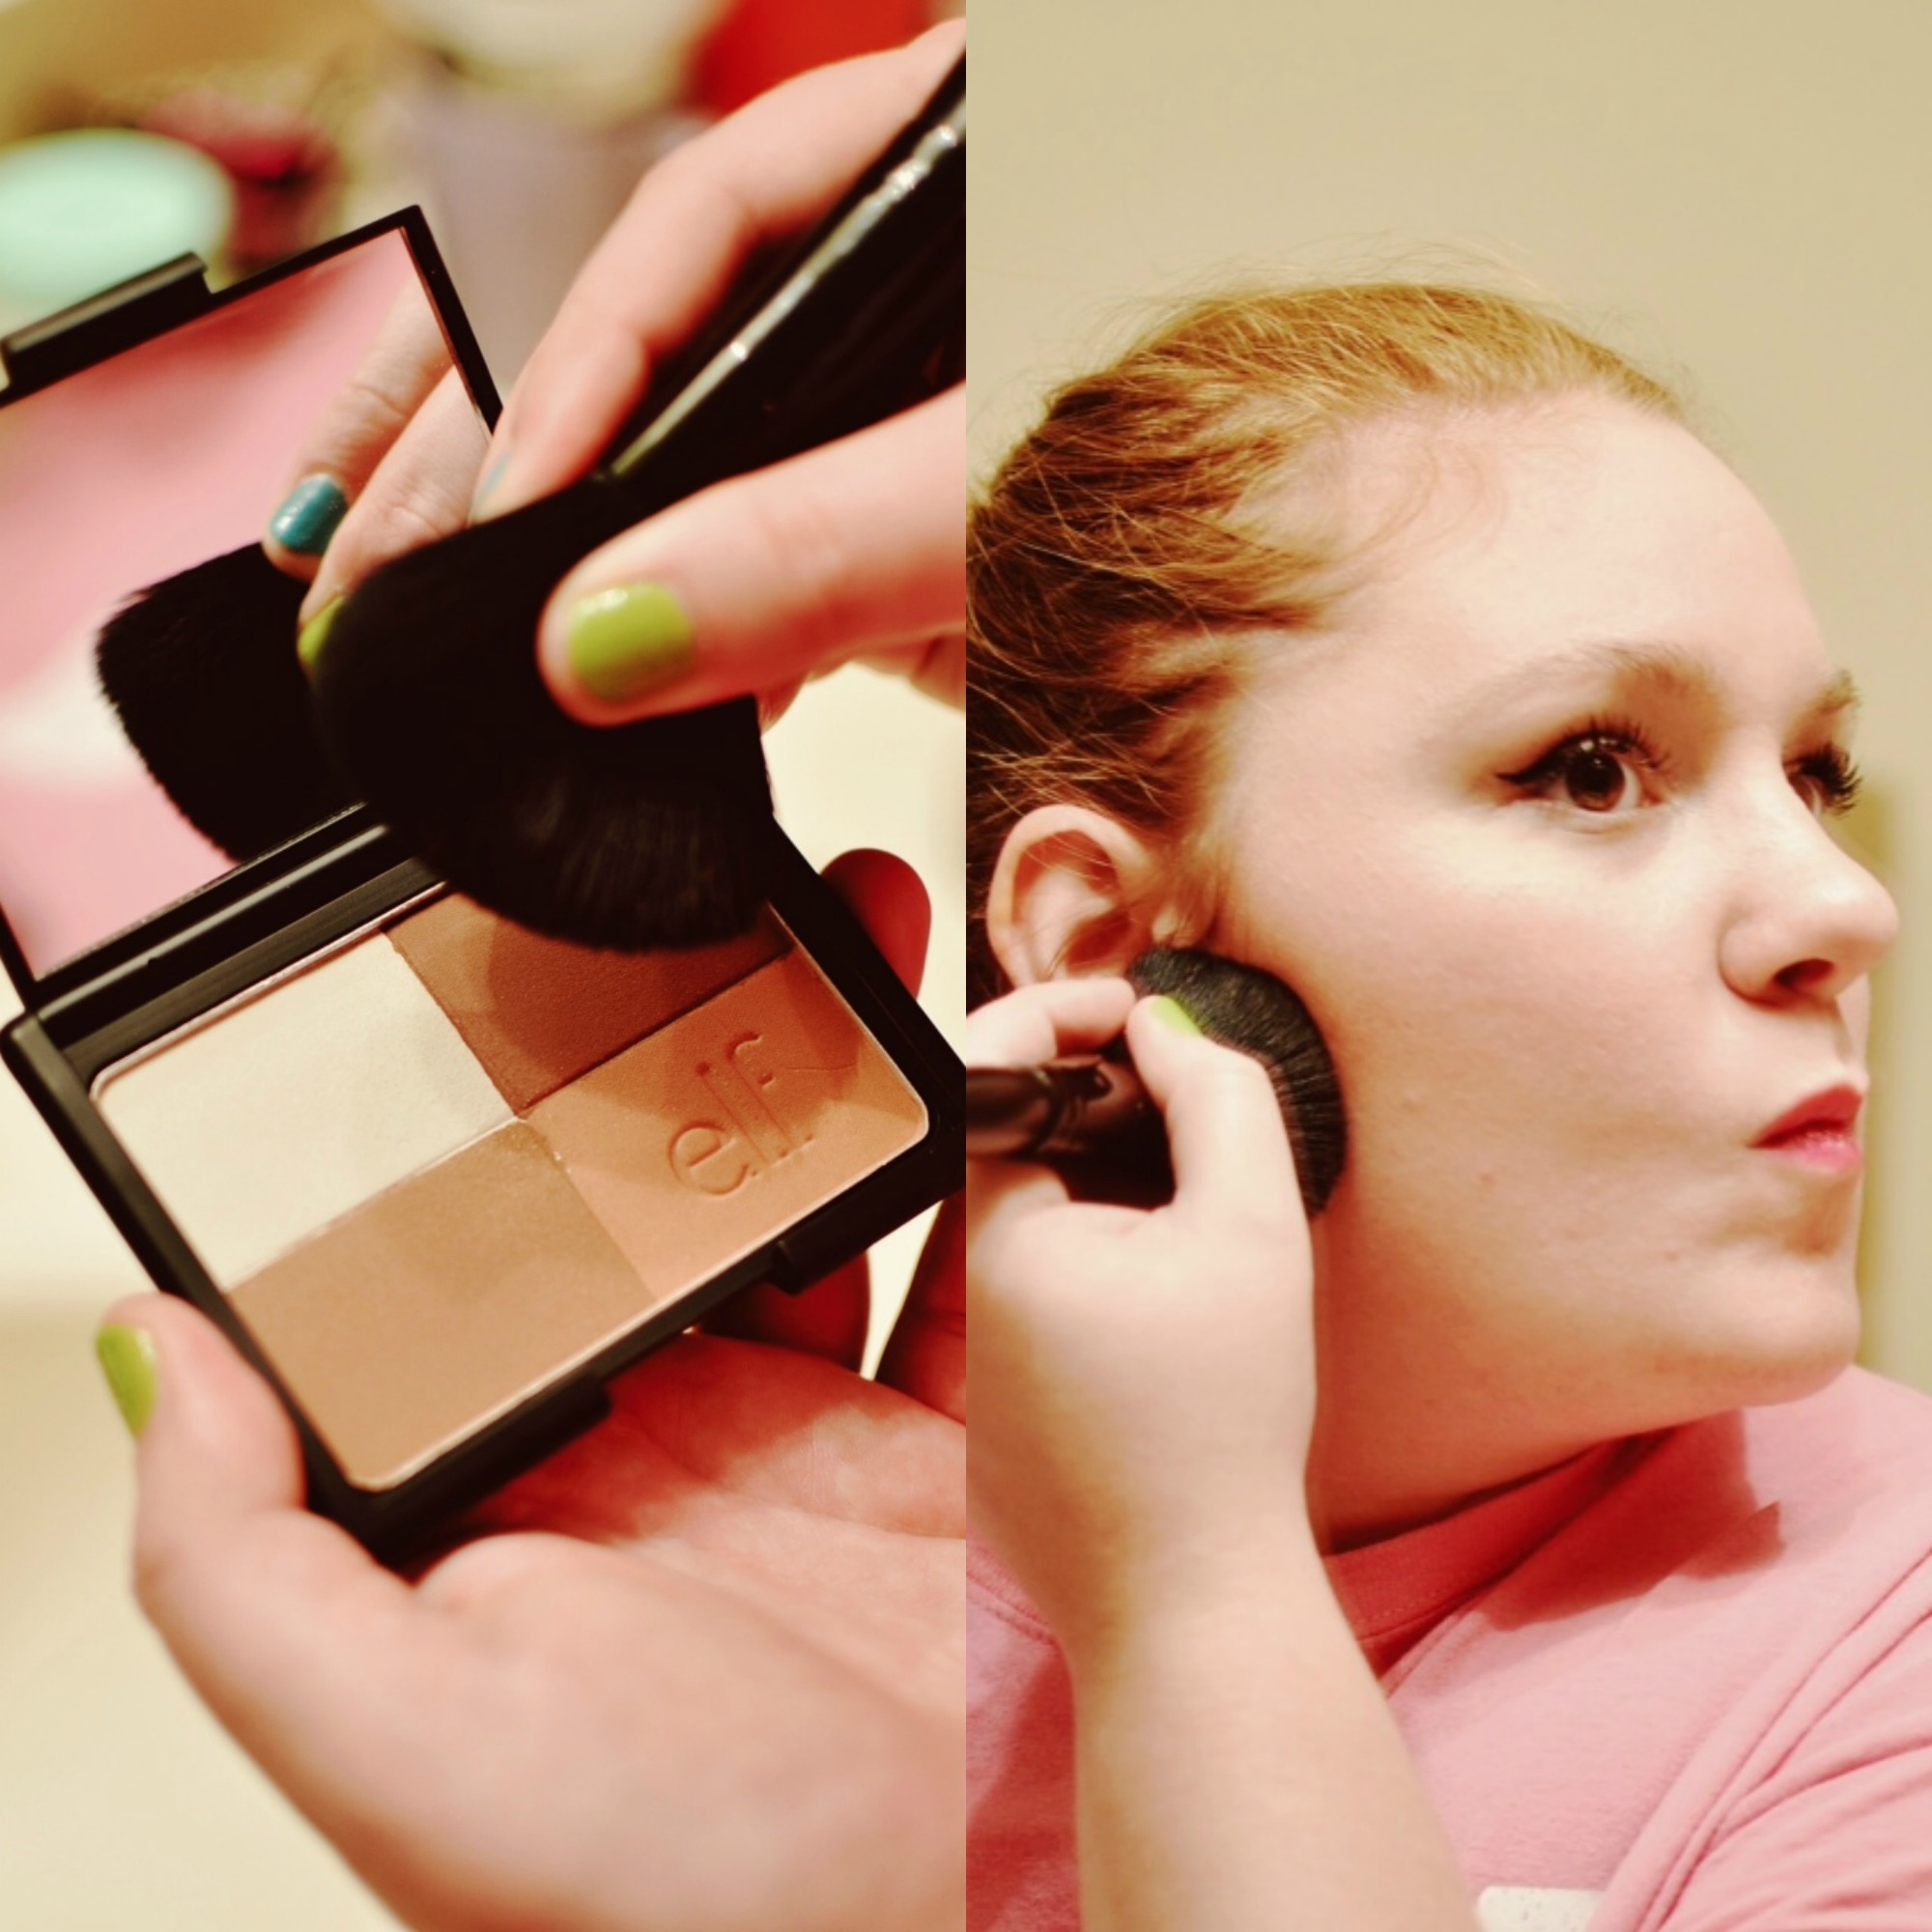
STEP THREE:
Bronzing and contouring. I’m using the ELF Cool Bronzer pallet. I’m taking an ELF Powder Brush and pinching it to give me a more targeted application. I use the bottom left shade and contour from my ears to about halfway down my cheek toward my mouth and blend it out so I don’t have a harsh line. I’ll also blend my brush over the entire pallet and apply it to my temples or all over my face to warm up my skin tone.
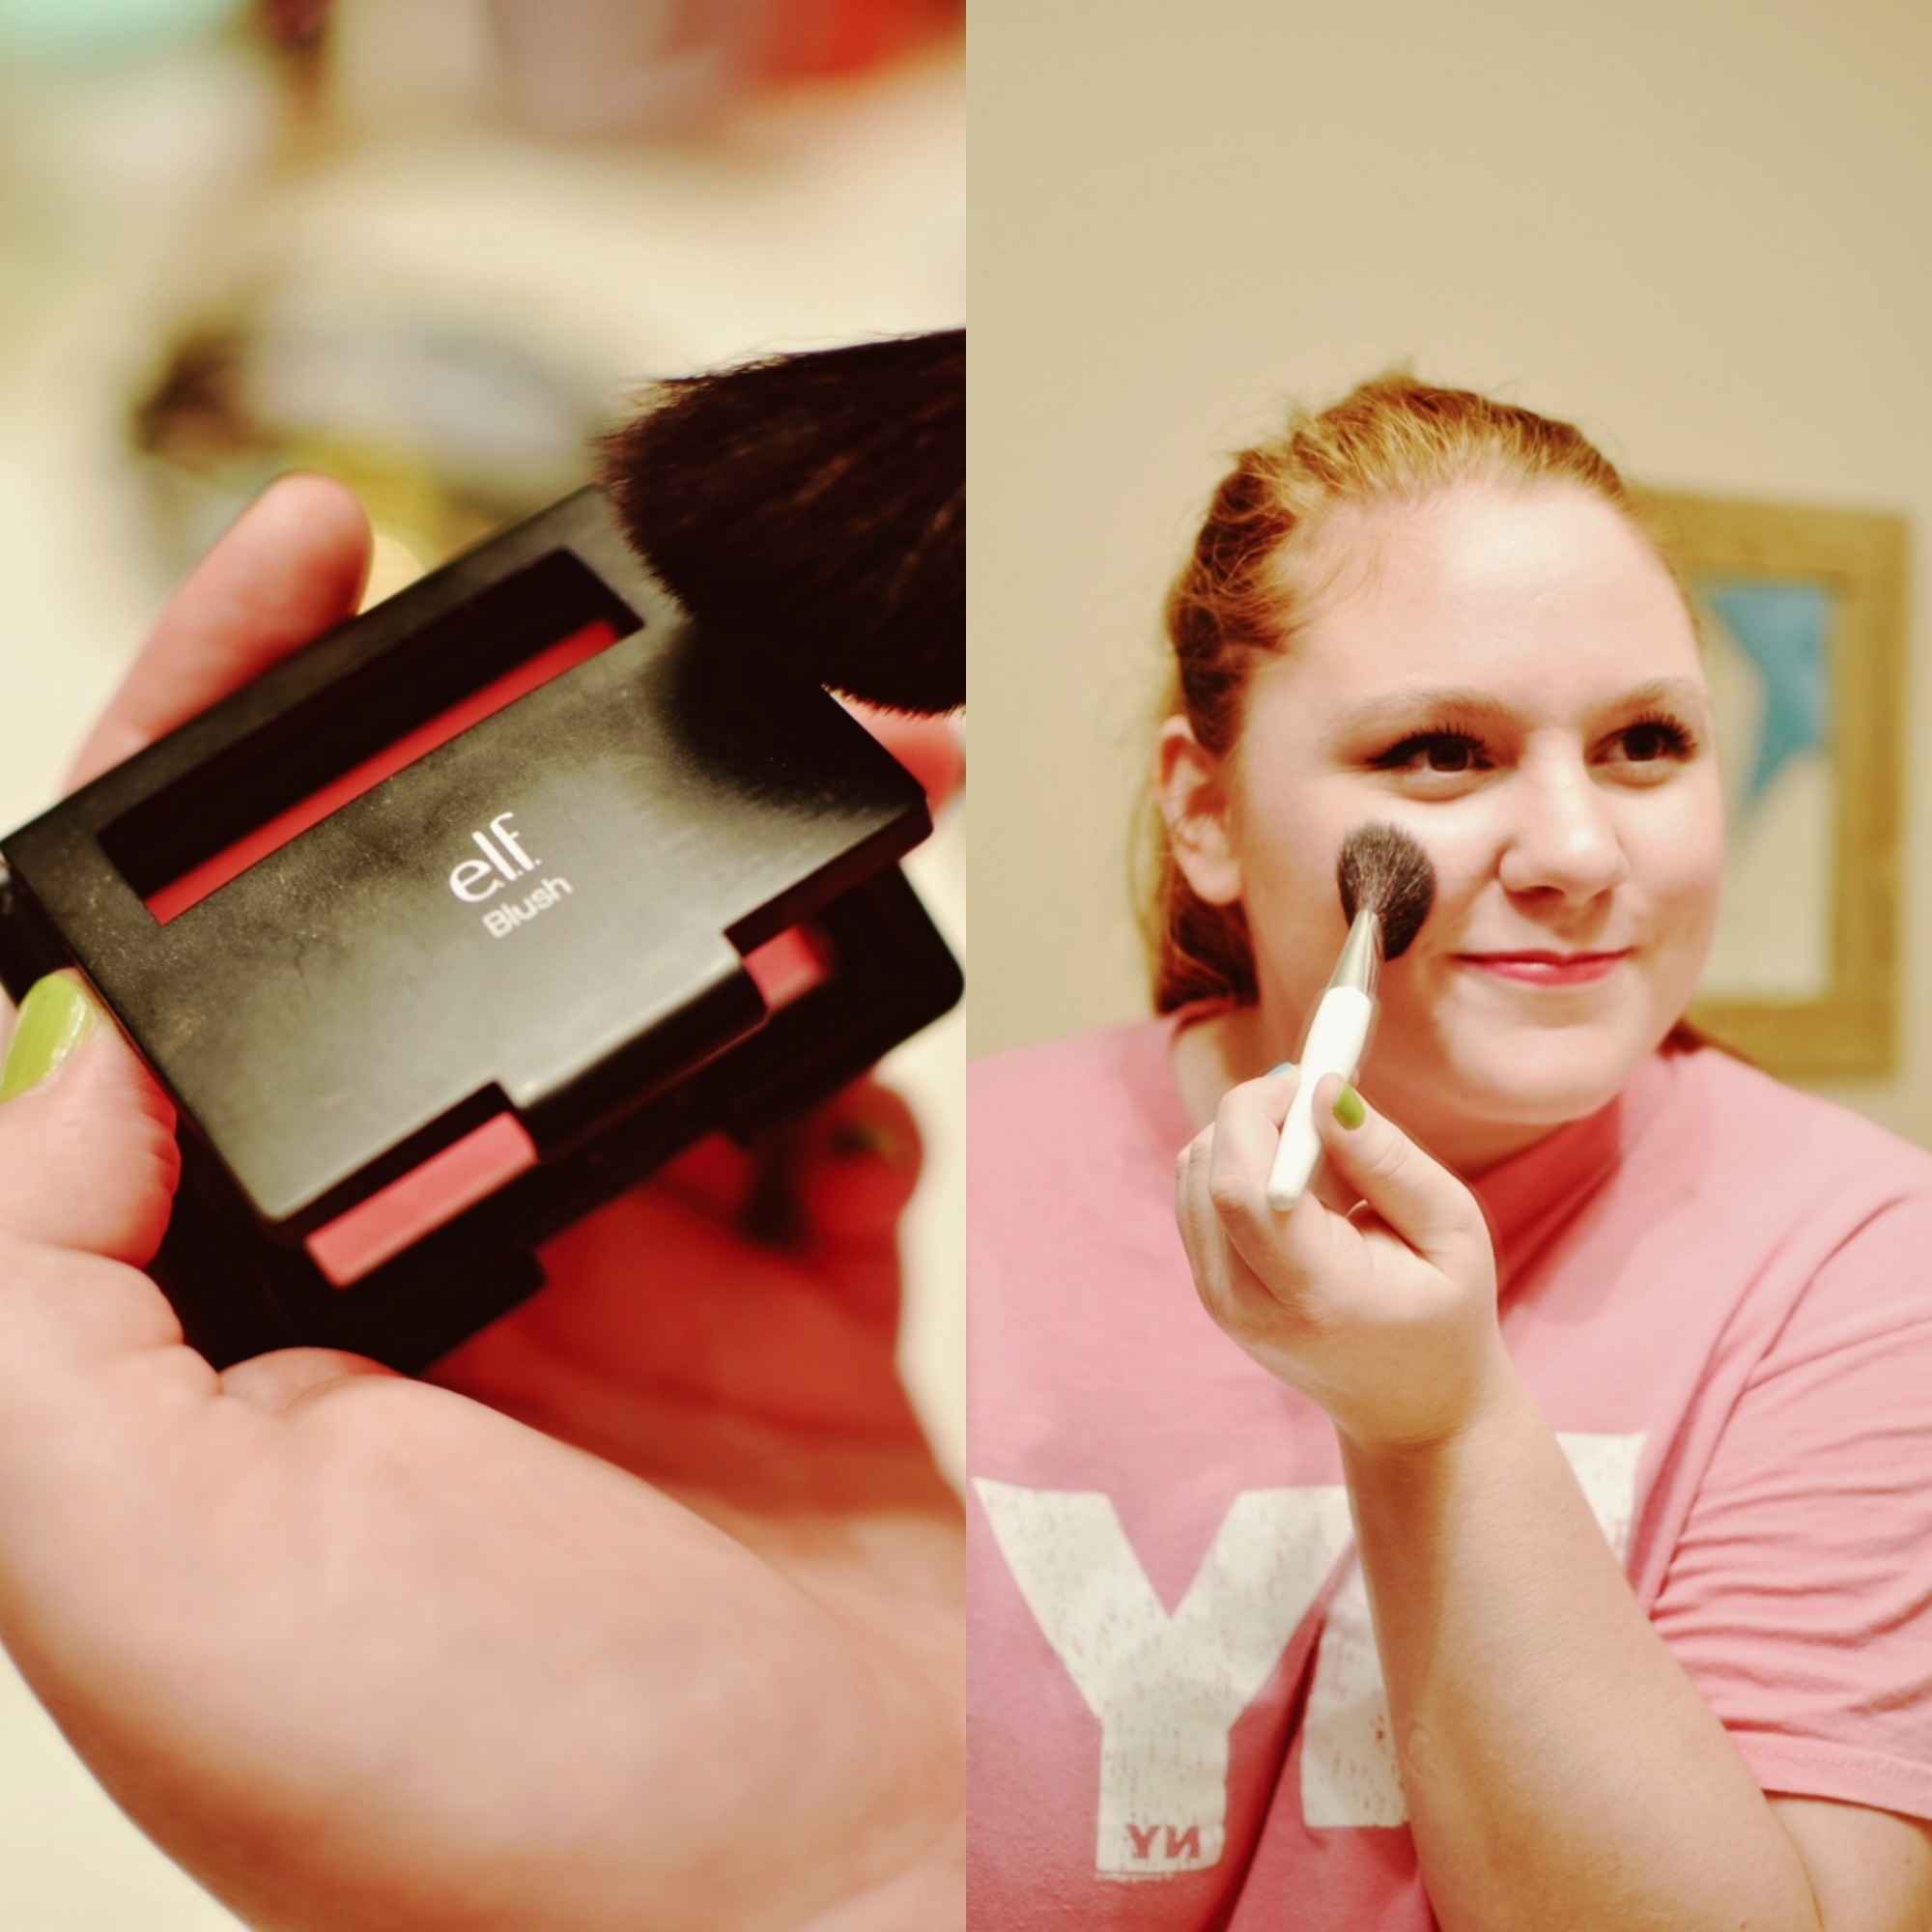
STEP FOUR:
Blush! I’m using the ELF Studio Blush in Pink Passion. Don’t be scared! This is a very bright pink but is sheered out once applied on the face. I’m using a Sonia Kashuk Angled Blush Brush and applying it on the outer apple of my cheek and blending towards my hair line. Putting blush too close to the nose gives a look of redness and we don’t want that!
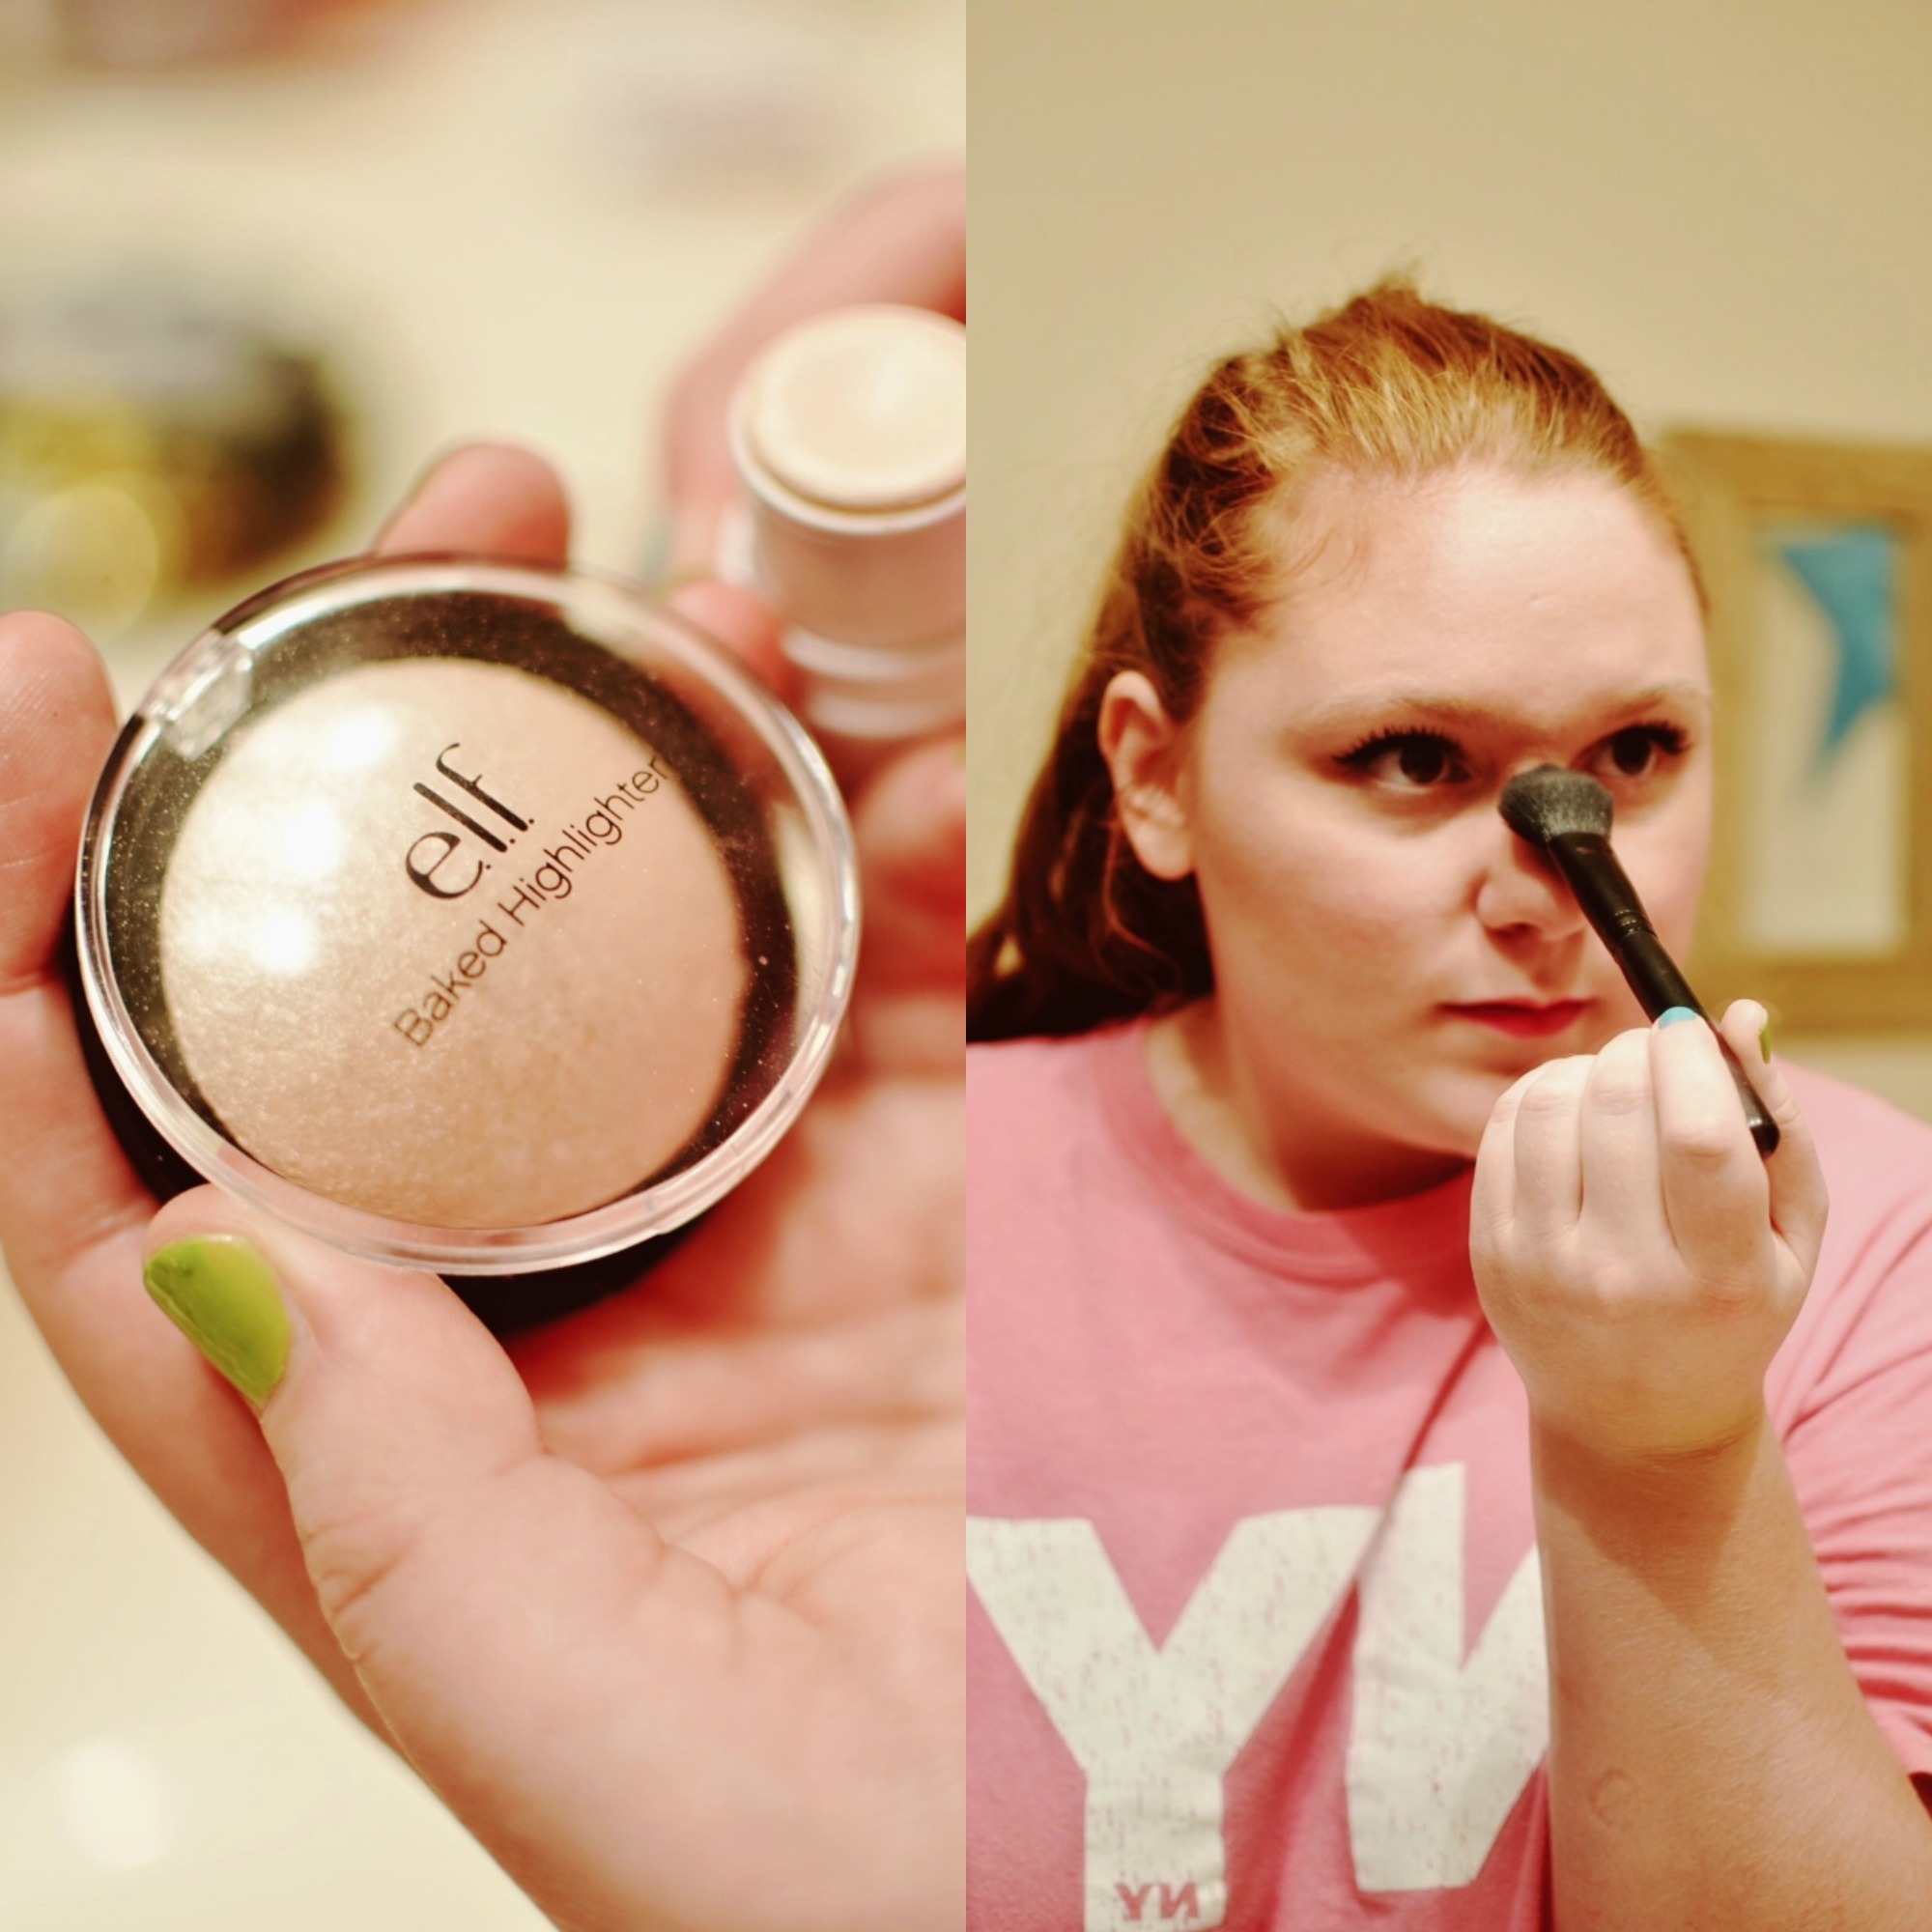
STEP FIVE:
Highlighting! I’m using one of ELF’s newest product, their Baked Highlighter in Moonlight Pearls along with a cream stick in Spotlight also from ELF. First I’ll put down the cream and layer the powder on top. Moonlight Pearls is a very shimmery champagne color so be careful and don’t apply too much. We don’t want a look of oiliness! I apply this down the bridge of my nose and on my cheekbones. Other places you can apply are on the chin and between the brows. I choose to skip this since my skin tends to lean towards the oily side and any shimmer will just enhance that.
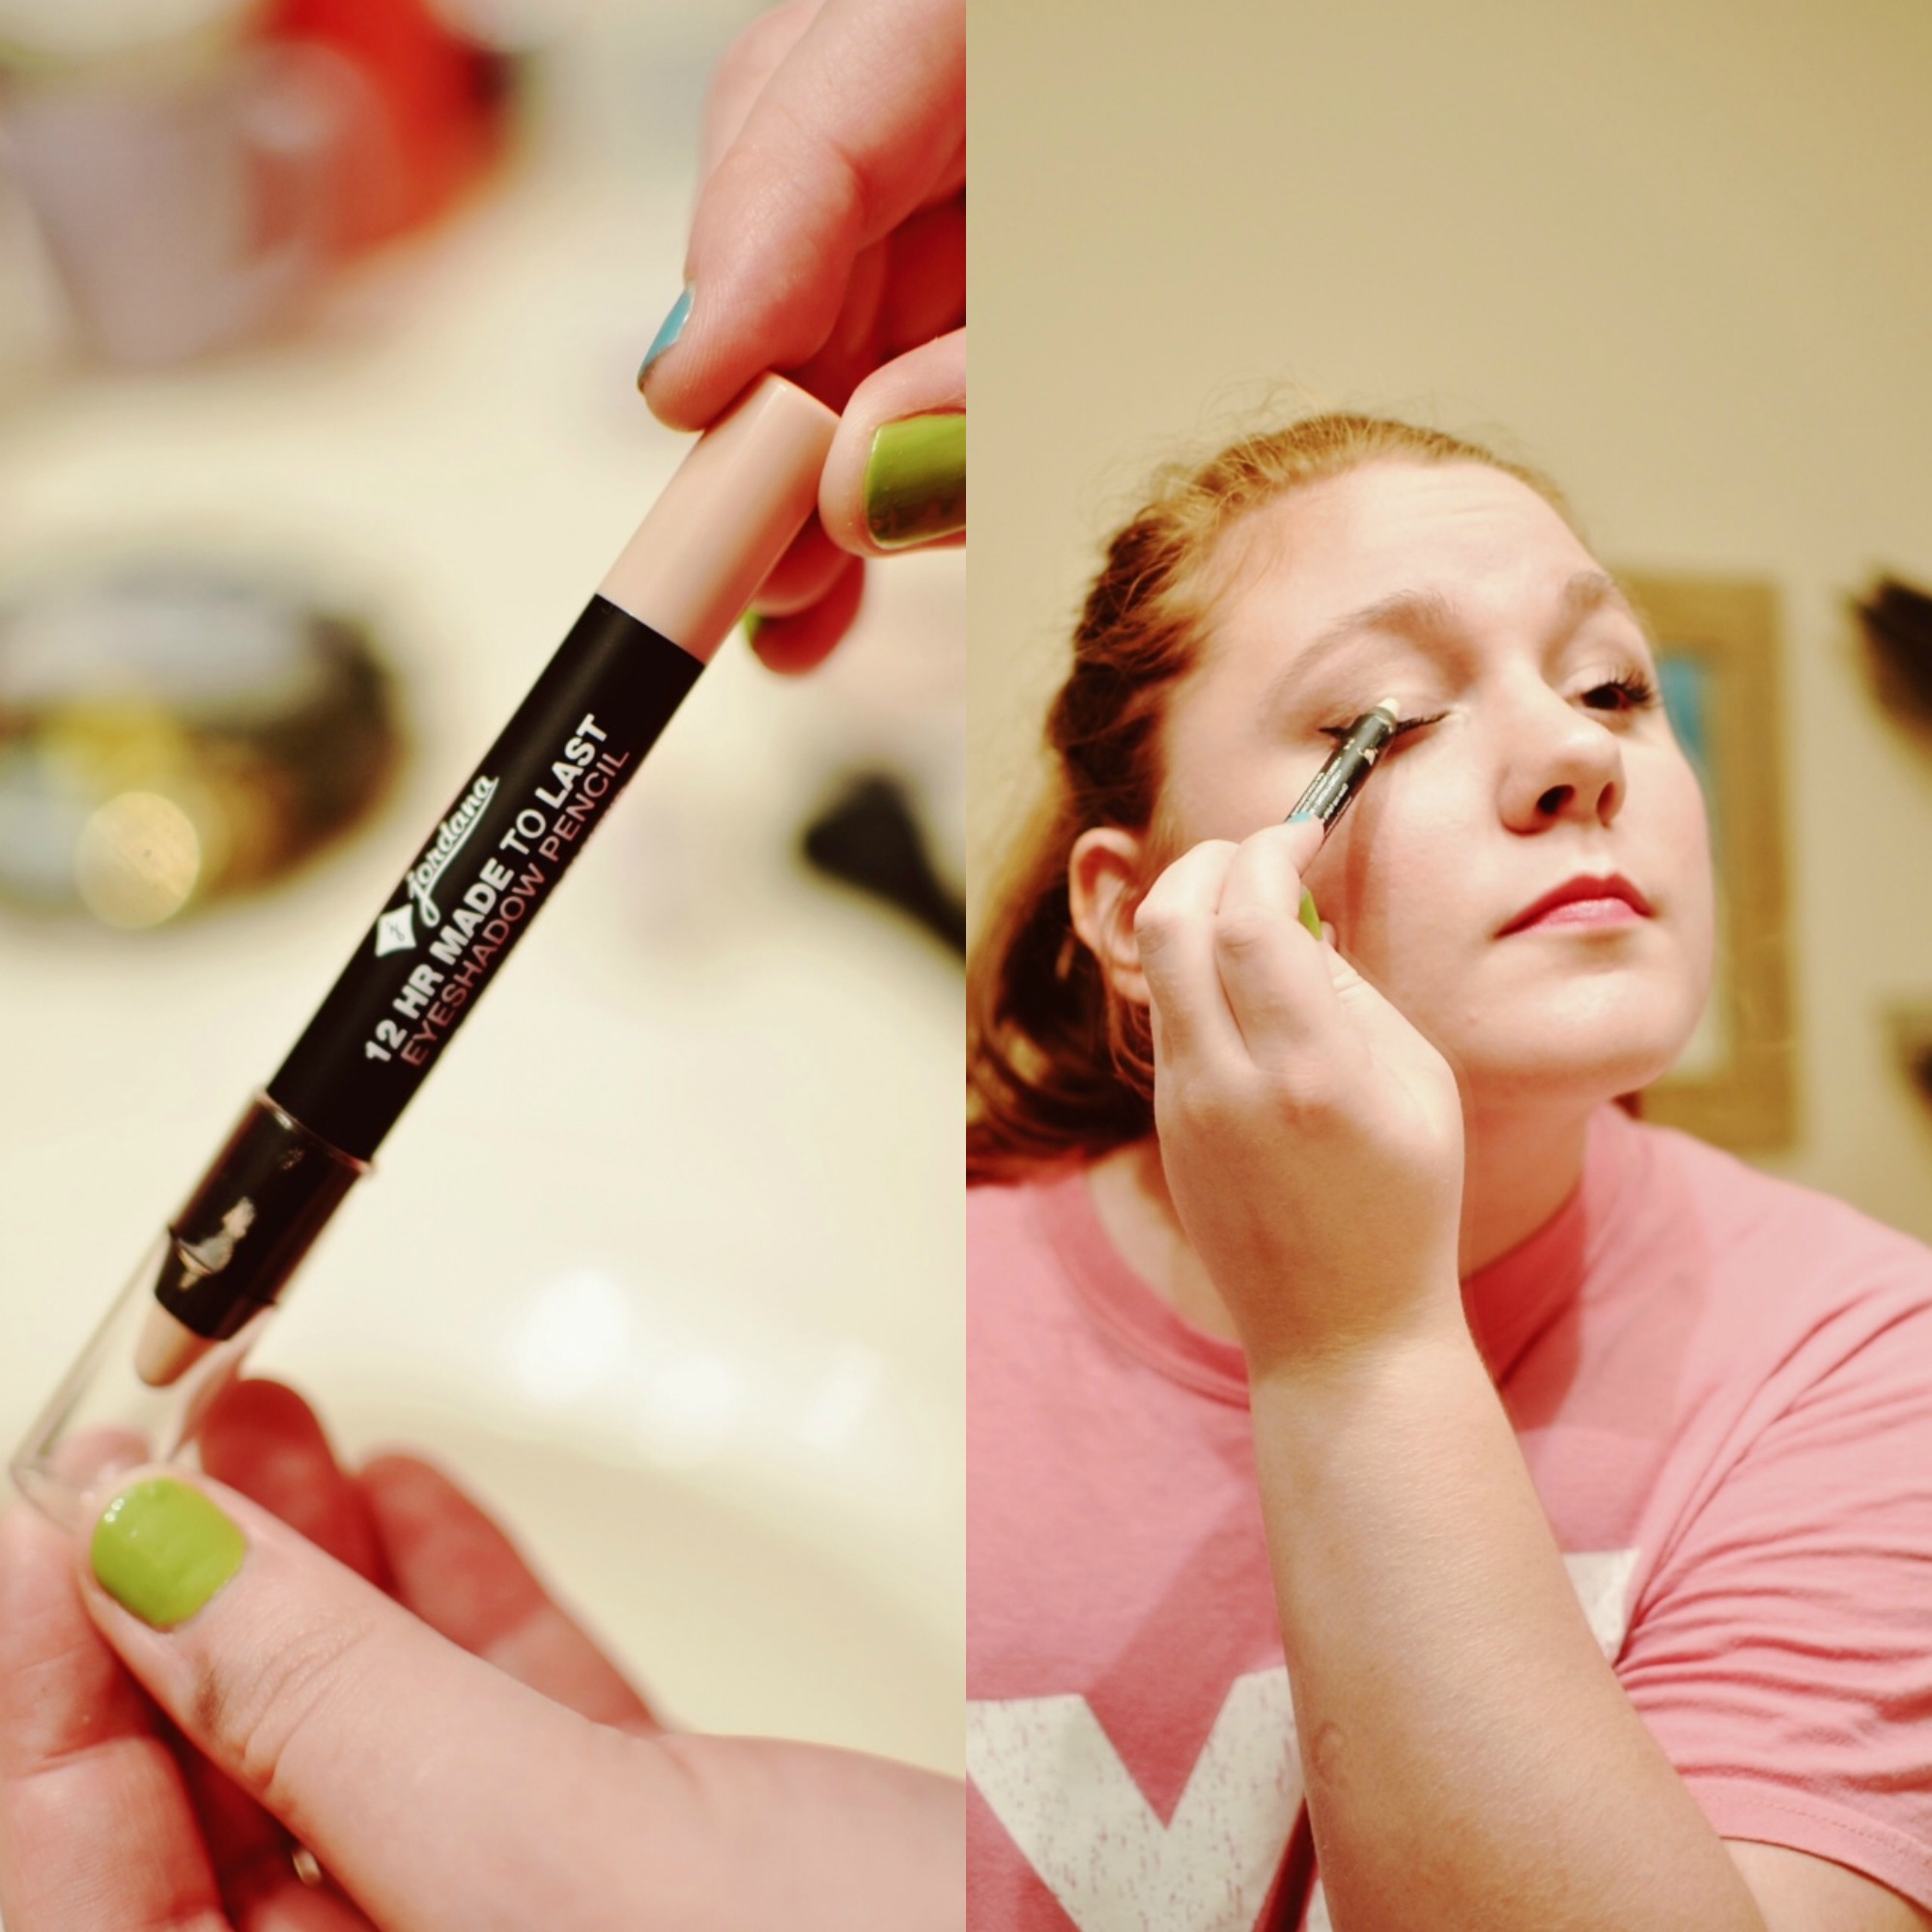
STEP SIX:
On to the eyes! I’m using a new product from Jordana called the 12 HR Made To Last Eyeshadow Pencil in Continuous Almond. It’s a nude, matte skin tone shade that when layered under shadow helps it to stay much longer! You can find this brand at any Walgreens. It’s very affordable! Check out some of their other products as they are longlasting and inexpensive. 🙂
STEP SEVEN:
Eyeshadow! I’m using my original Naked pallet from Urban Decay. First, I’m going into the shade called Naked on my ELF shadow brush ($1!) which is a little deeper than my skin tone and putting that all over my lid. Second, I’m taking Buck which is a warm, orangey brown and buffing that into my crease to give me a natural depth. Lastly, I’ll take a little of the shade Virgin, a shimmery white, and pop that into the area around my tear duct to brighten up the area. Be sure to blend everything out with a bare fluffy brush.

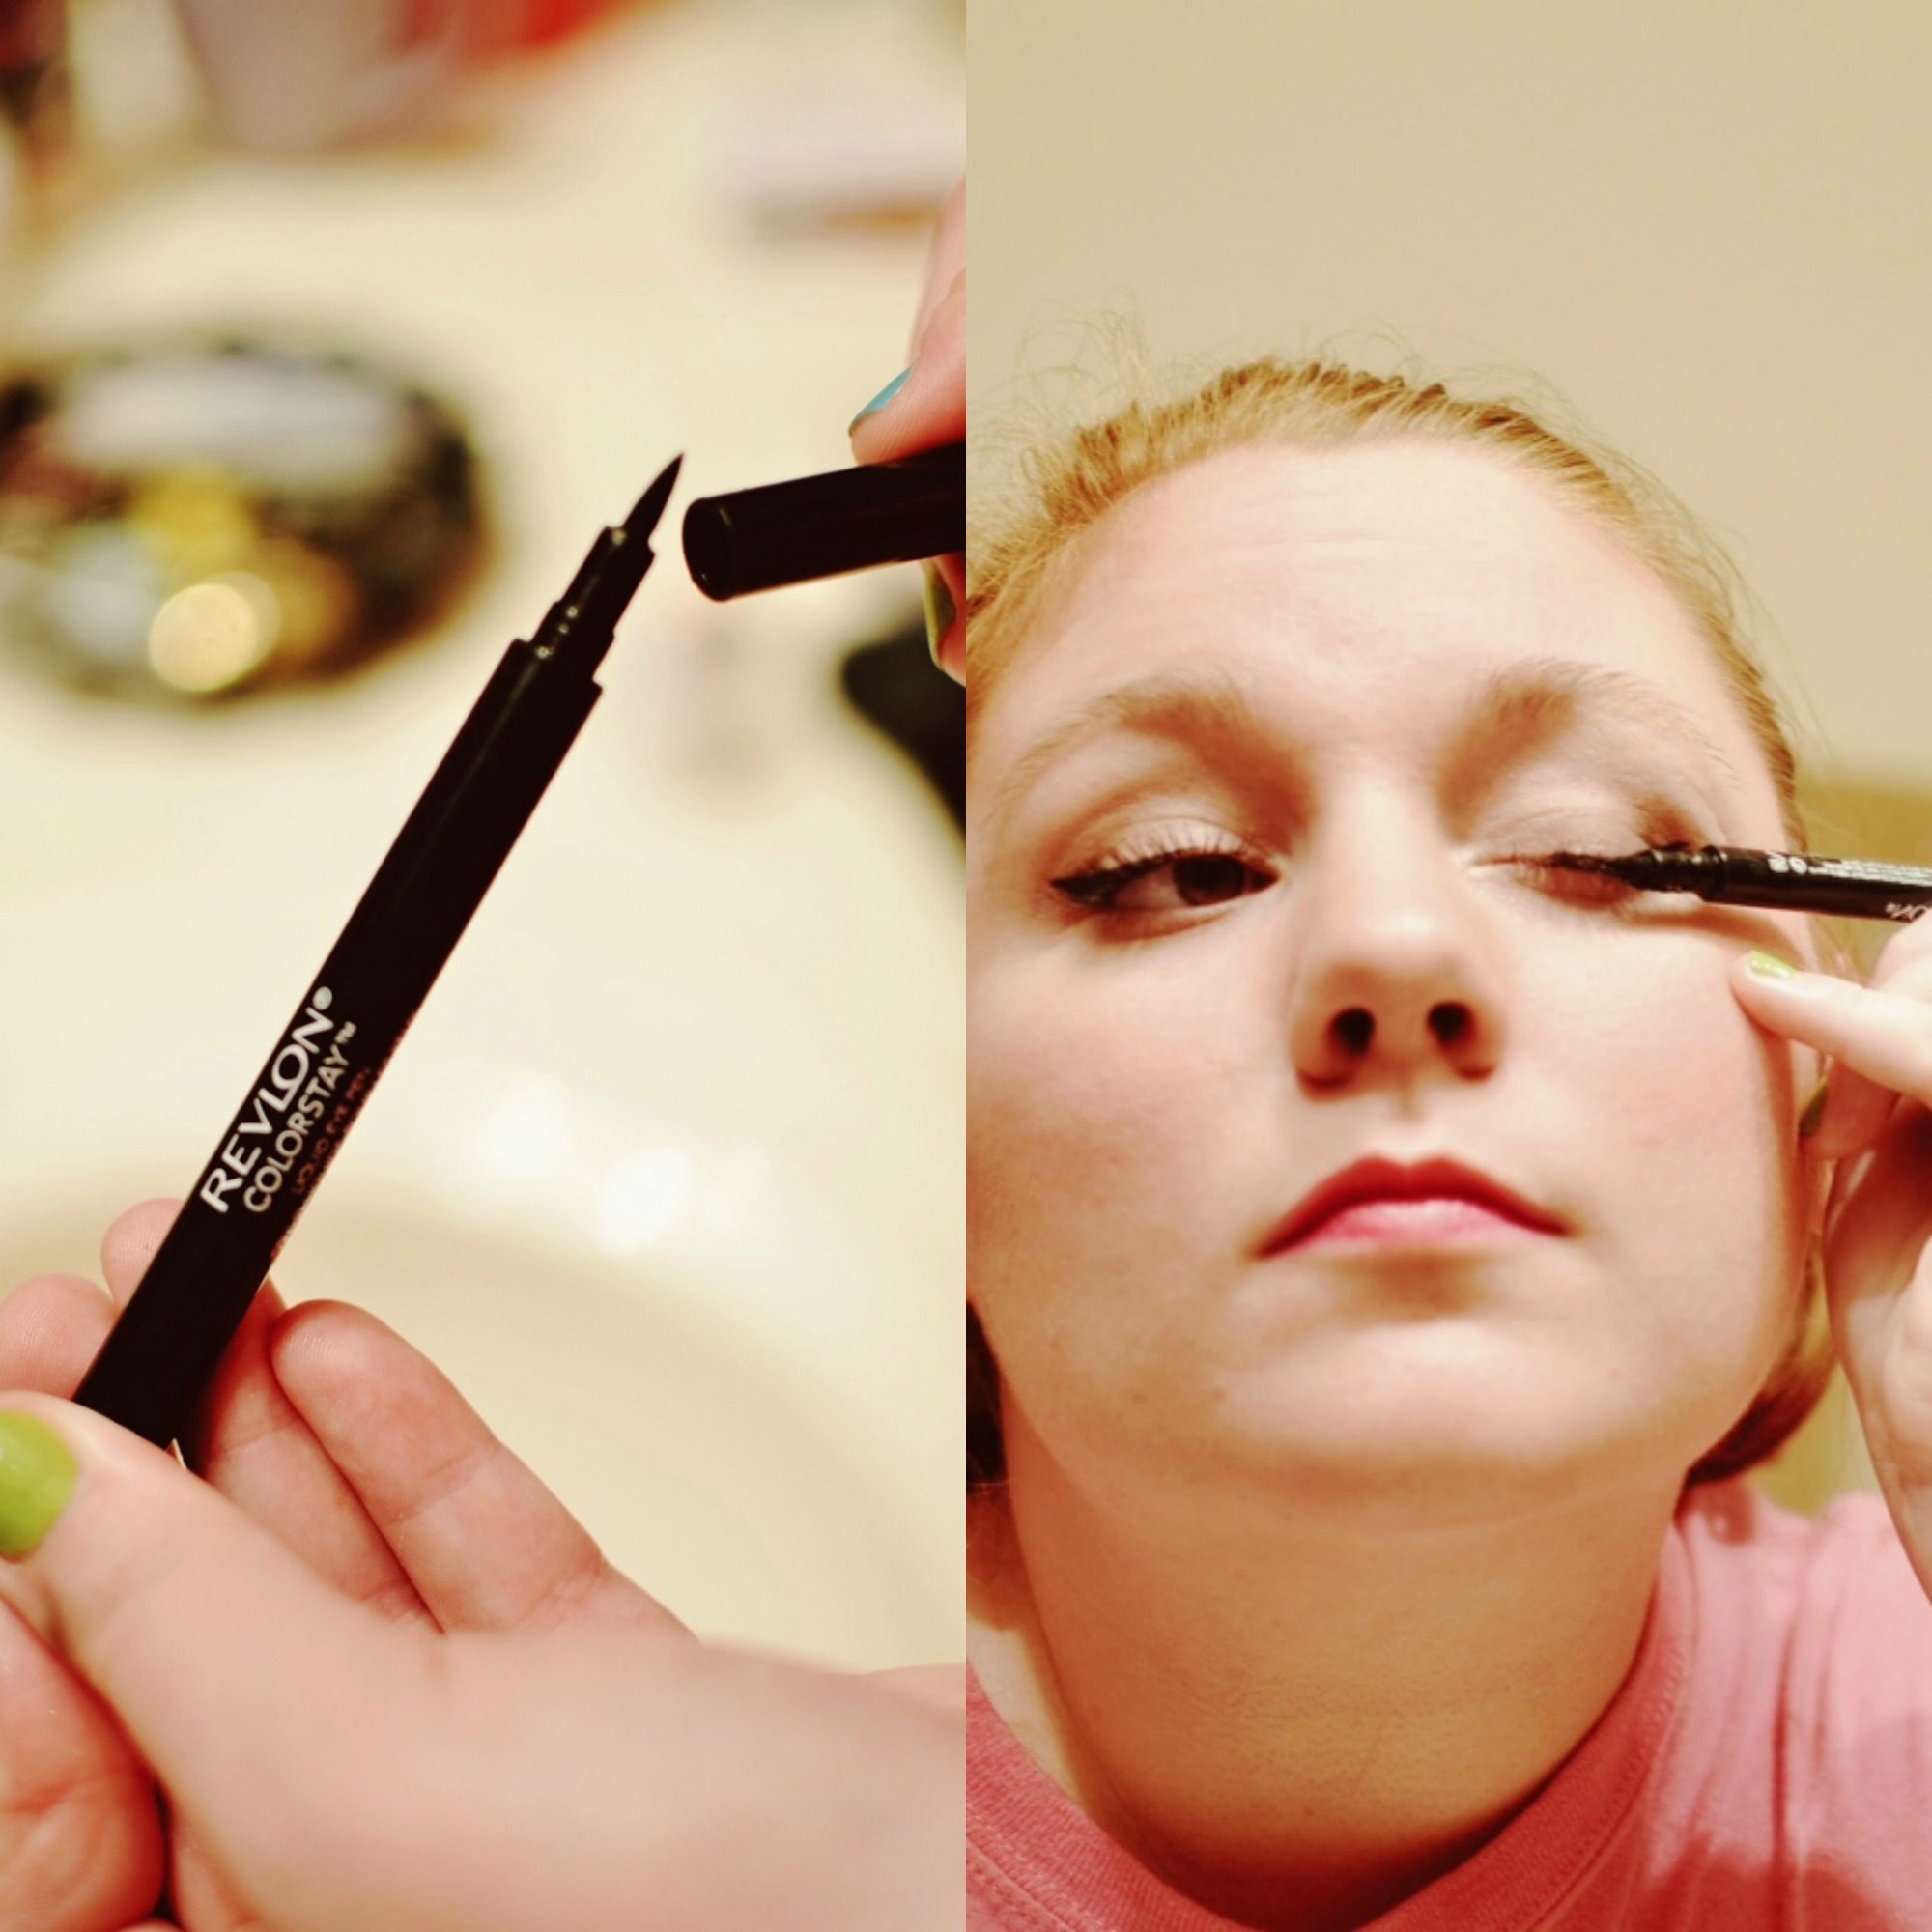
STEP EIGHT:
Eyeliner! I’m using my Revlon Colorstay Liquid Eye Pen in Blackest Black. Draw this along your lashline and draw a cateye flick on the outer edge of your lid. Since this is in the form of a pen it makes it very very user friendly. Just hold like a pen and write with it! Much easier than using a gel liner with a brush or a liquid liner. This product has been lasting me quite a while as well so don’t worry about it drying out.
STEP NINE:
Mascara! I’m using the Jordana Best Lash Extreme. It’s $2.99 at Walgreens and is a great formula. It comes out a little clumpy on the brush so I like to clean it off on the tube before applying. If you like, curl your lashes before applying. For this look, leave mascara off your lower lashes to make the cateye stand out!

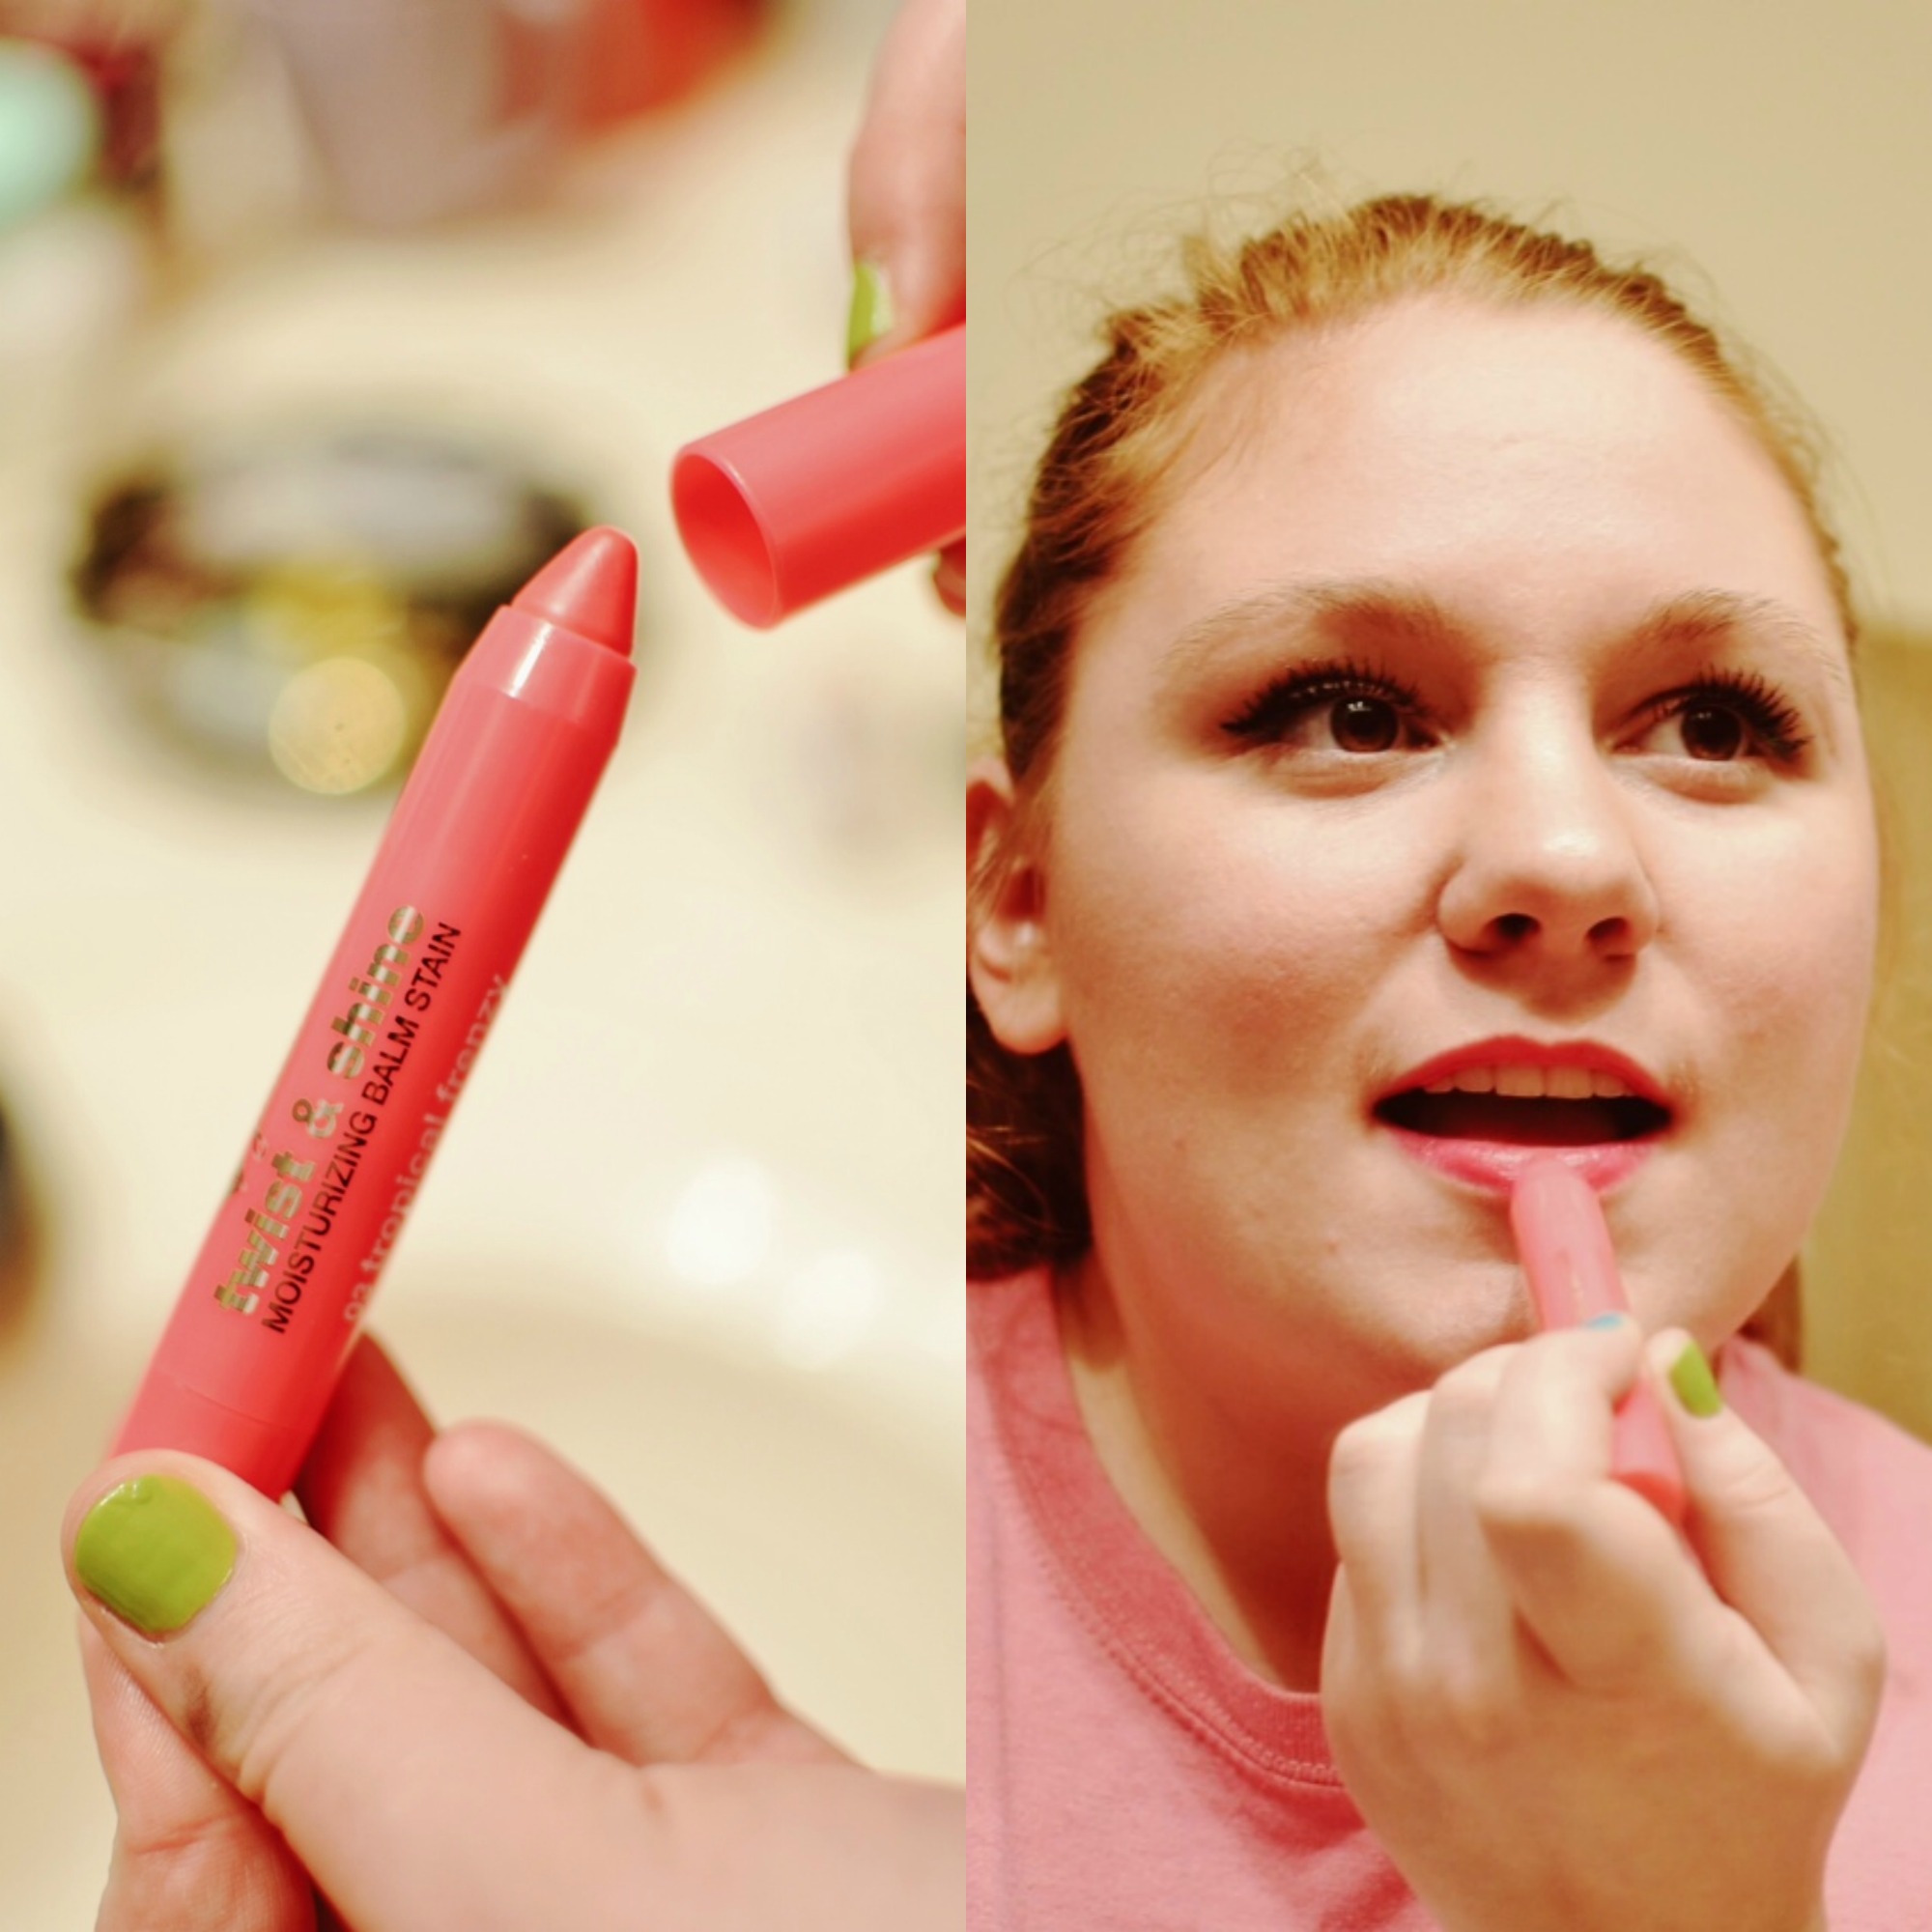
STEP TEN:
Lips! I’m using the Jordana Twist and Shine Moisturizing Balm Stain in Tropical Frenzy. This is an excellent hot pink color that is easy to apply because it’s in a big pencil form! This product is moisturizing and very pigmented. Even after the shine is gone there will be a noticeable stain on the lips.
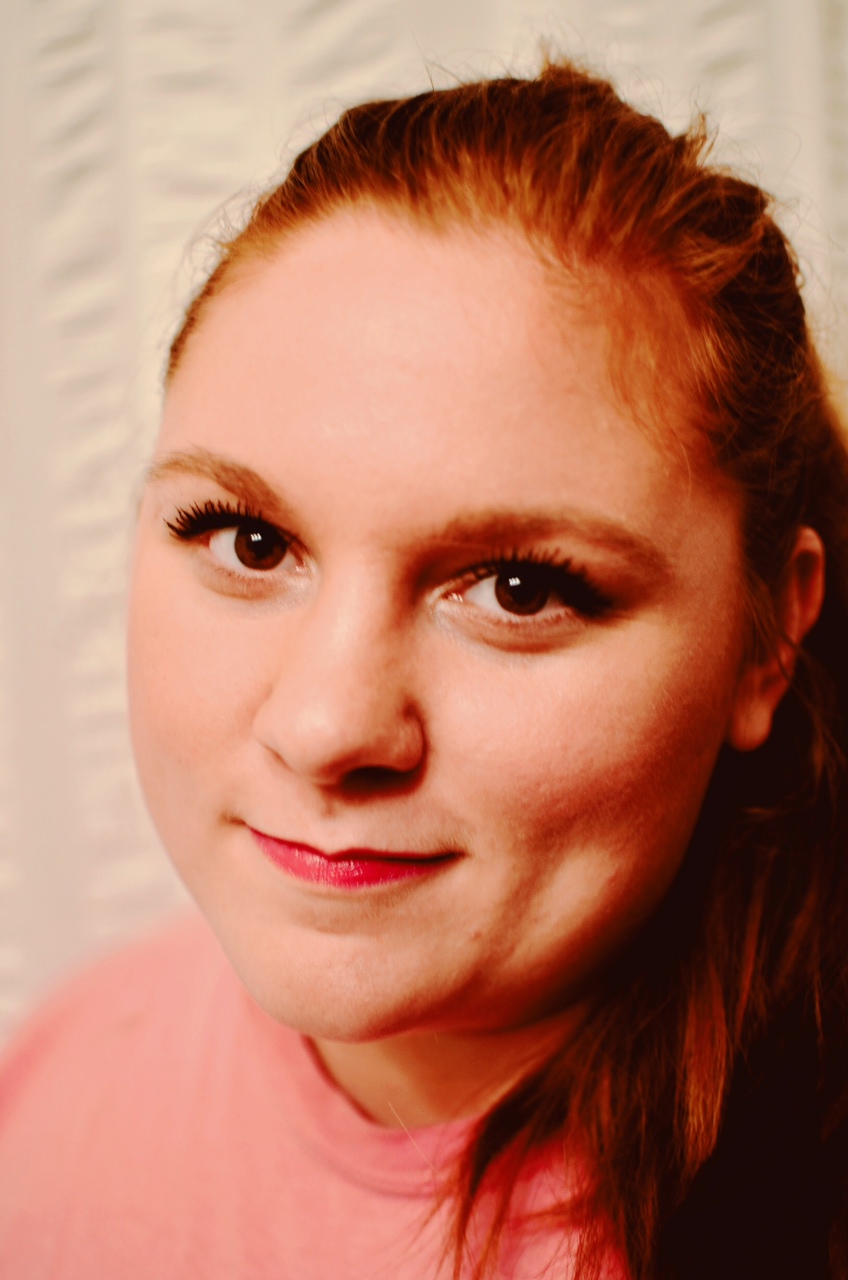
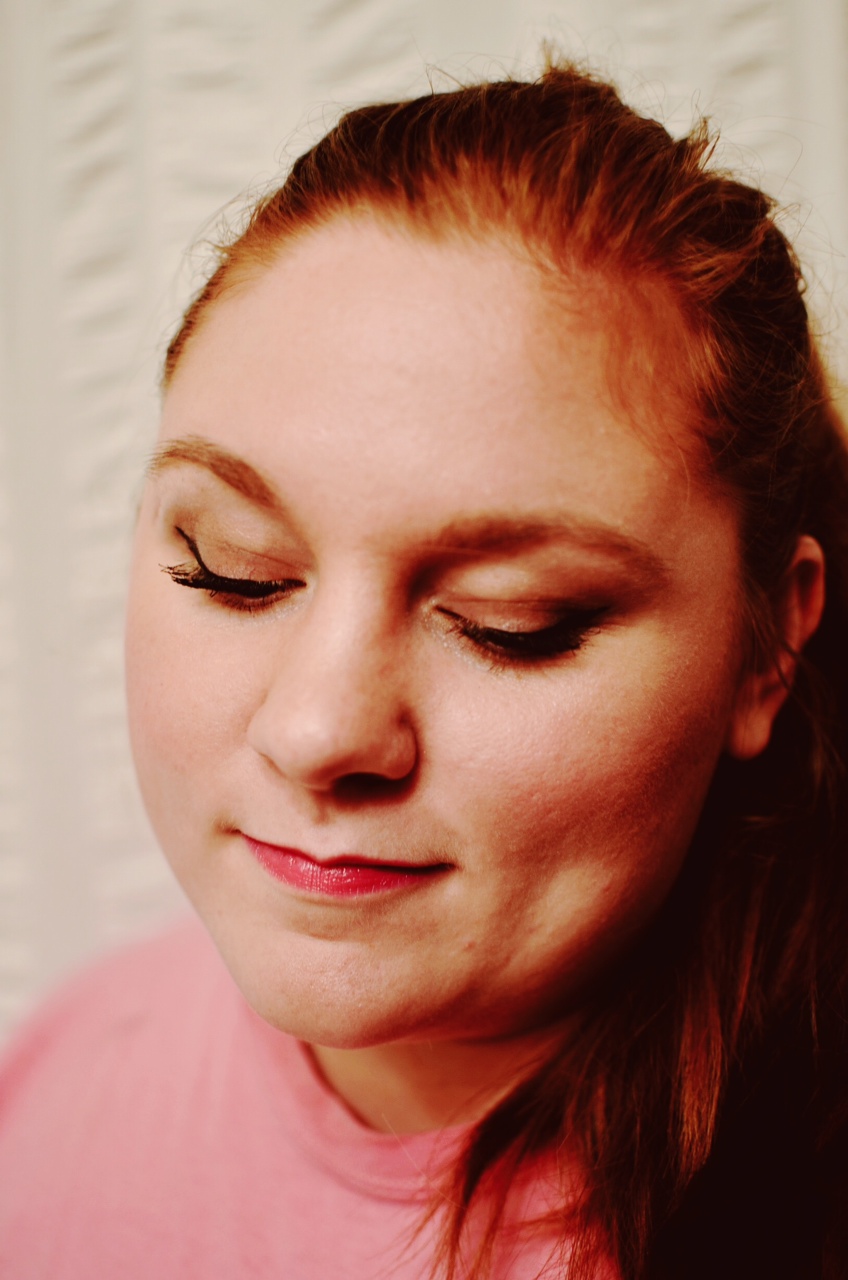
And there you go! A hot pink and cateye look wearable for day and night. 🙂 If you want to go a little more glam, add a deeper colored eyedshadow on the lid and smudge some on your lower lashline. For even more glam add false eyelashes! Hope you have fun with this look and let me know if you try it!